
Showing posts with label 3D Art Production. Show all posts
Showing posts with label 3D Art Production. Show all posts
Monday, 18 April 2016
3D Animation and Rigging
3D Hand
This was to teach us how to model a hand from model sheet images. This was challenging as it is hard to switch between all of the orthographic views and model at the same time. I learnt a lot about this method of modelling doing this. This changed my view on the method and now I like it more than I did when I made the pillar.


3D Tileable Texture
This was to teach us how to make a tileable texture from a 3D model. from a top down perspective and cropped is a tileable texture. This was done by copying one side of the bricks to the other and placing new bricks around them. The final thing is rendered out and put into photoshop where it can be adjusted to the right colours and have textures overlayed etc.


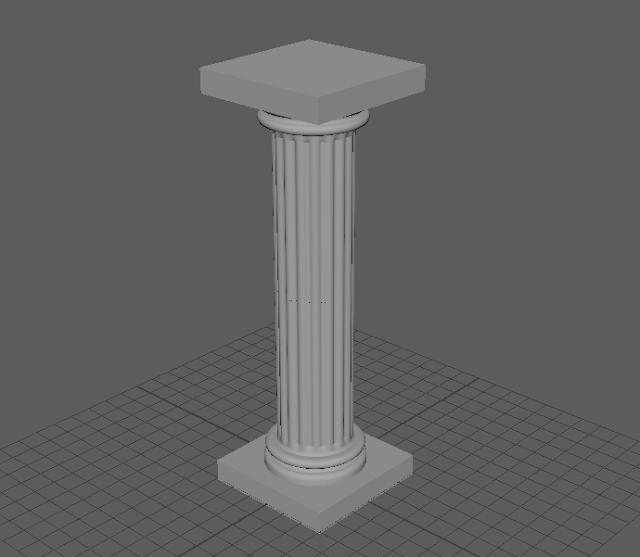
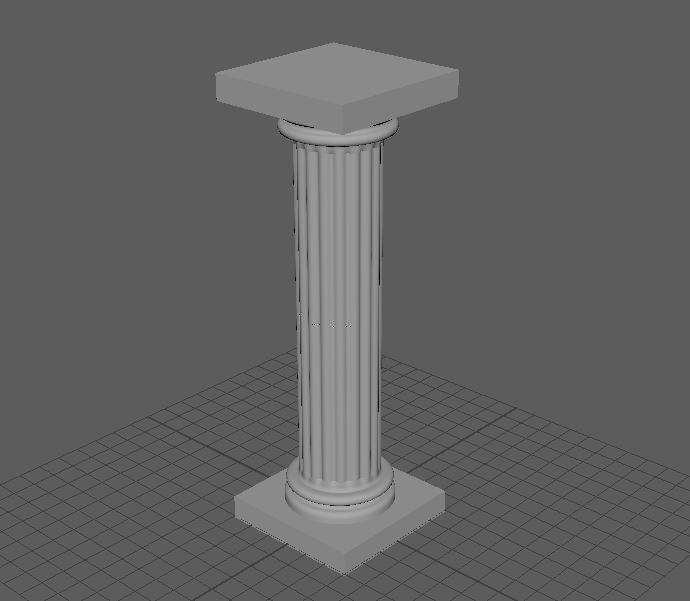
3D Pillar
This was to teach us how to model from the orthographic views. It was relatively quick to do as most of it was modelled by extruding. I am not a massive fan of this method of modelling but I cannot deny that it is very useful to use if you need to model something accurately from side on images or model sheets.


3D Mushroom
This was to teach us how to model using extrude along path and the sculpting tools. It was also to teach us how to texture. The different shaped mushrooms were achieved using the transform tools and deform tools, which were fun to play with. I learnt a lot about Maya doing this.


Final Battle Arena in Unity
So when I put the statue into the existing battle arena in Unity. It looked good but the old arena still needed updating. In the process of doing this I had to update Unity. For some reason when I opened the project again all of the materials had broken and were not fixable. So I had to make a new project. I do not regret this choice as it meant I could start off with the new arena model straight away. I applied all the textures and animated the camera. This time I added in more lights and some alarm lights. I decided to make the ground have blended materials but there was no way to do this in unity without buying a software. I scoured the internet for a solution and found one. I downloaded a vertex painter with blend shaders and got a texture for the ground that I liked. However, for this blended material to appear in the build I have to place a duplicate of the ground object into the scene and not do anything else before building. If I change something after placing in the object, the material does not work. I have used emmisive maps on the crystals to make them glow for extra effect. Lastly, I added in a few sound effects and some music that I have used in a previous project. I also animated a few of the alien ships in the scene to add to the story a little bit and make the arena less static. I am really happy with the way the camera moves through the scene and I like how some of the story is shown throughout the arena.
 There is a particle effect that I am really happy with for figuring out myself. On one of the spaceship engines I have made a particle effect for heat distortion. It has been made using the glass material shader and a normal map I made from some random generated clouds in Photoshop. I wanted to mention it because I am very happy with the effect.
 Finally, I thought I'd show the final statue in Unity. I have used such a bright light coming in from the left because it shows the detail of the normal map really well and makes the scene more dramatic. I am pleased with the way it turned out.


Friday, 15 April 2016
3D Wagon
The wagon project was a tutorial made by our tutor. We had to apply textures to a premade wagon model using Quixel in Photoshop. I am not a massive fan our Quixel. I like the effects it has for textures and the quality of textures it produces but I do not like the process of making them as such I struggled to use it. I prefer making textures manually but I do see the benefits of using Quixel. However, I managed to get a nice wooden and metal texture for my wagon which I put on the model in Maya and Unity. This taught me about the different maps that I would need for a basic texture.


Friday, 8 April 2016
2D Group Game Boss Concept
The boss went through many different iterations before we chose the ball design you can see below. I even took a design all the way to pixel art before changing my mind. The idea behind the first set of designs was a swarm of hive mind based enemies. The second set was an idea for several separate parts of a boss with a central piece. The third set was for many turrets which would be part of a boss. The fourth was just some random designs I was playing with that were partially based on cameras and Glados from Portal. The last was the initial idea I had but rejected due to the immense task of animating and coding it.


Friday, 25 March 2016
Battle Arena Changes
I am making some changes to my battle arena to make it look better and for the story to show through in it more. I am also changing it to accommodate for the statue. I need to update some of the textures also to be higher resolution because it will look odd with a high resolution statue next to a very low resolution environment. Previously I made a single texture for the terrain so that I could have ambient occlusion on it. However, I need a tilable texture to get more detail around the statue area. I have decided to make it a blend shader to get even more variation in the environment. I could make it in Maya but I would just have to recreate it in Unity so I have decided to make the new texture once I have got the FBX version of the arena into Unity. I will however, render out UV and ambient occlusion maps for the new models as I make them.
I have an idea to better lead the viewer through the arena. I will use an alien spaceship with a spotlight to highlight areas of the map as the camera travels round it as it is particularly hard to see the arena in the current Unity build. To start changing the arena I added in some spaceships above the arena and also some crystals to show the mineral that is being mined. I also added a tiny bit more detail to the statue's base. Here is the new arena model.


I have an idea to better lead the viewer through the arena. I will use an alien spaceship with a spotlight to highlight areas of the map as the camera travels round it as it is particularly hard to see the arena in the current Unity build. To start changing the arena I added in some spaceships above the arena and also some crystals to show the mineral that is being mined. I also added a tiny bit more detail to the statue's base. Here is the new arena model.


3D Statue Textures
The texture for the statue was made with several rock textures, some rock crack alphas, colour layers, overlay layers, an ambient occlusion map, and a UV snapshot. I made the rock crack alphas from images of ZBrush brushes. I used a mix of colour layers and overlays to make the green glowing areas. Here is the first texture.
 Only the eyes are glowing in this initial texture. I decided to change the colour of the rock because all the other alien structures in the battle arena are purple. I chose a green colour for the glowing because I want the mineral that is being mined to be that colour. I also made an emissive map of the glowing areas which I will put below. I also will put the normal map below. This is generated from everything except for the ambient occlusion map and colour layers. Here is the next version of the texture.


 The texture of the staff was a bit more basic. I used the same rock textures and the same colour but I did not use an ambient occlusion map as it didn't have much effect. The normal map is made in the same way as the body's. Here it is.


3D Statue Model Progression
So I used the model sheets to make the parts separately. Every single one was made in half and then I mirrored them to get the other half. I did modify the head from its initial model because it did not fit onto the body well. I looked closely at the initial concept art to modify it but I also used the aesthetic I had established on the body model to make it fit better. This is the final model for the statue with all the components attached.
 I had also started to rig it at this point and as you can see I also made a staff. This is not the final version of the staff. I made the staff based on the repetitive pattern I had established on the body. I will make a separate post to discuss the texture more but the next step was to make the texture. Here is the test with the initial texture.

This is an early version of the texture without the final colouring and details. I had planned to add soem glowing lines through the armour to hint at a hidden energy or mineral inside the statue's rock. Here is the next, and final, version of the texture.

Here I have added some glowing lines amongst the armour and made some of the purple rock glow a green colour. I have made this an emissive texture although I have not applied it in Maya. The next step was skinning and posing. Skinning this model was a challenge but I set it up so that I was happy. I realised during this step that I have not rigged the legs in the best way. The hip joints are slightly too low but I had to make it work otherwise I would have to redo the skinning. Anyway I experimented for some time until I found a pose that I liked. Here it is with the staff's final model.

I did not pose it with the purple texture as I found it slightly distracting. Overall I am happy with this pose but there are a few problems with the model. I should have added a few more edge loops under the arm as the texture has stretched slightly. I will attempt to position it in the arena, in Unity, without drawing too much attention to this area. Anyway, here is the final pose with everything textured.

3D Statue Model Sheets
As part of the statue project we have to create model sheets for our statue. I started with the head as this is one of the main focuses of this project. As my statue is an alien figure I did not want it to have a human head. So I looked at the praying mantis and alien concept art made by others. Following the reference of my concept art I created this model sheet.
Front:

Side:

I then moved onto the body without focusing on the head hands or feet as they are parts that need their own model sheets.
Front:

Side:

Next I moved on the hands.

Lastly I did the feet.

Front:

Side:

I then moved onto the body without focusing on the head hands or feet as they are parts that need their own model sheets.
Front:

Side:

Next I moved on the hands.

Lastly I did the feet.

Monday, 15 February 2016
3D Statue Concept
For 3D Art Production this term we have to create a statue for our battle arena. Seeing as my arena takes place in an ancient alien site I felt that a statue of one of the aliens would be fitting. I had a general idea of what one of the aliens would look like but I still needed some reference. Here is the concept I came up with surrounded by some reference images.
 I then took this slightly further so that I'd have a little more to go on when creating a model sheet to model the statue from. I focused mostly on the head design before starting on the main bulk of the body.
 I am pleased with what I came up with.


Thursday, 10 December 2015
Battle Arena Finished - Showcase
To showcase my battle arena I imported it into unity. The process of doing this requires me to apply all of the textures I made to materials in unity. This is a lengthy process and required me to adjust the textures in Photoshop as I went along. I made the normal maps at this stage because it was easier to see what they would look like in Unity than in Maya.
At first I intended to have the sun casting shadows across the map but changed my mind because it didn't feel very atmospheric. So I made it night time and added height fog to the world. I animated a camera to do a fly through of the map but it still felt like it was missing something. That's when I decided to add particles systems and some lights. There aren't many lights but they make the world look like it had been inhabited. I added a duststorm particle system and altered the colour of it which gives the illusion of wind moving the fog. Then I added fire systems to the major impact points of the alien bombing ships. This really adds atmosphere to the map.
Here is a screenshot of the scene in unity.

Overall I am really happy with my battle arena. In future I will make my models with a slightly higher poly count because these ones are very low poly and you can get more detail if you use more.
Here is a shot of the final build in unity.

Battle Arena Finished - Textures
So once I'd finished the models I created UV maps to allow me to create textures. This is where I was thankful that I modelled in a low polygon style because I had less polygons to stitch together in the UV map. Nonetheless, it still took a long time to UV map every model in the arena.
In total there needed to be 24 textures to be used on the models. For each of these textures I needed an albedo, and ambient occlusion map. For the more important models I would need a normal map and possibly a specular map. For one of the models I ended up needing an emissive map too. For most of the textures I started with the uv snapshot and ambient occulsion render taken from Maya. Then I made a layer consisting of one colour behind these and a layer on top of this of a picture of rust. I created a layer mask on this layer and began to make the rust show in areas that made sense. Here is a screenshot of the bridge texture and the Photoshop layers to accompany it. This is a good representation of how I structured most of the textures.

Here are the textures added using lambert materials in Maya.

All of these textures are applied to these models in unity via specular setup materials.
Battle Arena Finished - Modelling
Over the past term at uni I have been working on the battle arena. The previous post showed the arena in a greybox form. This post will go over the models for the arena. To start here is the entire arena rendered out from Maya.
I've made a few changes since you saw it last. The most notable being the surrounding mountains. I made this change because initially I planned to showcase the map using a 3rd person character in unity. However, once I had got the initial map into unity for testing, I discovered that my model style was too low polygon for third person. This is because the player was tiny in relation to the models and unless I made the player a giant there wasn't a solution other than remaking the models. So I changed the idea of the game this arena would be used for. The game would now be a top down RTS. So I added the mountains to surround the map.
Since you last saw the map I also added a bridge in the middle of the map. This was because I felt that there was a space that needed filling where the bridge now is. I also populated the map with rock piles and containers/crates to make it feel more used.
Monday, 30 November 2015
Rock 3DAP-S03
This weeks 3D Art Production had us experimenting with more tools in MAYA. The first part of the tutorial we followed introduced us to the scultping tools in Maya. We made a rock to practice using them.
 After this we practiced some new modelling techniques. To do this we modelled a column using an image from side view. We used the curve tools and soft selection to achieve the curved shapes of this pillar.

Barrel 3DAP-S01
The first session of 3D Art Production involved us getting used to Autodesk Maya. To do this we were given a tutorial on how to make a barrel. The tutorial covered some of the more essential tools. This tutorial also taught us about UV mapping. Once we had modeled a barrel we took several UV Snapshots. One of the outlines of the UVs, one of the coloured materials and one of ambient occlusion. We combined them in Photoshop and added some textures before bringing it back into Maya on a lambert material. I ended up with this as my final barrel.
 I could have made a better texture for this barrel. It needed a bit more work to make it suit the low poly style of the model. I could have made the texture more cartoony. I am happy with the result though and now know how to model and texture, to a degree, in Maya.

Sunday, 4 October 2015
Battle Arena Greybox
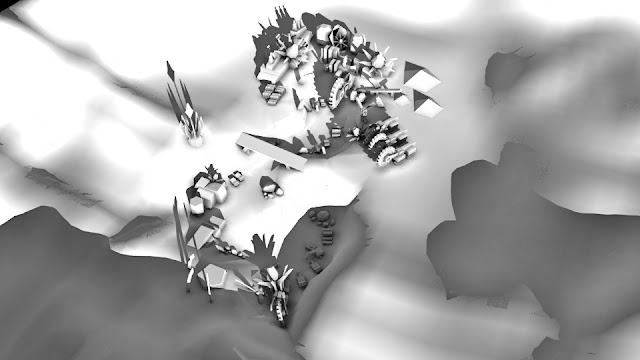
The first term of the 3D Art Production Course entails creating a battle arena. As part of this project we must create a grey box version of our arena.
The idea of my arena is an abandoned mining operation. A corporation found an incredibly valuable resource buried on an asteroid underneath an ancient alien structure. However, after weeks of mining and the destruction of much of the sacred alien structure, one of the untouched structures came to life. It sent a beam of light up into the sky and part of it began floating. A day passed and nothing happened. Just as the corporation thought they were safe gigantic spiked rockets fell from the sky, aiming all over the facility. They struck at enormous speeds, ravaging the structures and vehicles. The remaining workers went into panic and tried to flee the facility. They did not escape. From the falling ships came hordes of alien monsters which tore the workers apart. Although the angered aliens destroyed the facility they made a fatal mistake. The facility was on a remote asteroid, so they had to keep fuel with them. They stored it in large tanks which were designed to withstand a lot. One of the smaller alien ships went straight into the central tank. It exploded and the expanding cloud of fire killed everything still living on the asteroid. The sight of the decrepit mine now is eerie.
For now we are just grey boxing our arena. Later on in the course we will make a statue to go in the arena. I have left a podium overlooking the mine to put a statue on. I think it will be of one of the aliens that the structure belonged too.
I'm really happy with how it turned out but I think maybe there should be more in the mine area.
Here are several images of my arena. Starting with the mood-board.


Subscribe to:
Posts (Atom)